19 June 2020 - 26 July 2020 (week 10-week 15)
Soo Wen Yi (0334653)
3D Modeling _
LECTURES_
Lecture 07 _
19 June 2020 (week 10)
We learned more about Zbrush this week, zremesh is to reduce poly counts and remeshing evenly. Super high poly obj will have a possibility of crashing outside of zbrush, so don't go to high. Dynamesh will add more poly but it will result in bad mesh flows so have to use dynamesh with zbrush together. Model in t pose to avoid tearing when rigging.
Lecture 08 _
3 July 2020 (week 12)
We had a short session today learning about zspheres, it is used for bone/structure, it can also be used to quickly get a block out of a character using zspheres and converting to mesh.
INSTRUCTIONS_
FINAL PROJECT_
Week 10
19 June 2020
Final Project
While making the skirt I ran into a problem of the skirt being too pixelated and weirdly cut because I needed the bottom of the skirt to have tears and rips.
 |
| Fig. 1.33: problem with the skirt |
Week 13
10 July 2020
After getting feedback from Mr Kannan, I added a bottom piece to the staff and tweaked the model and also tried to fix the skirt.
 |
| Fig. 1.34: example given by Mr Kannan |
 |
| Fig. 1.35: feedback given by Mr Kannan |
Firstly I started to reconstruct the skirt using plane part and connect them together, but dynamesh does not work with connecting the planes and made a lot of holes.
 |
| Fig. 1.36: making another skirt with plane |
 |
| Fig. 1.37: skirt front panel |
 |
| Fig. 1.38: outcome after dynamesh |
So after that I gave up on using that method and used another method using curved bridge tool and slice tool to cut the slits.
 |
| Fig. 1.39: texting another method but I realised I can't use symmetry using slice tool |
 |
| Fig. 1.40: After dynamesh everything closed up |
So after testing those, I just decided to use my original skirt and delete the faces inside the skirt.
 |
| Fig. 1.41: after deleting the faces inside |
 |
| Fig. 1.42: final model in zbrush |
Then I moved on to do retopology of each subtools and do as much as I can before the next class, here are some that I did.
 |
| Fig. 1.43: eyebrow retopology |
 |
| Fig. 1.44: headband retopology |
 |
| Fig. 1.45: earring retopology |
 |
| Fig. 1.46: arm band retopology |
 |
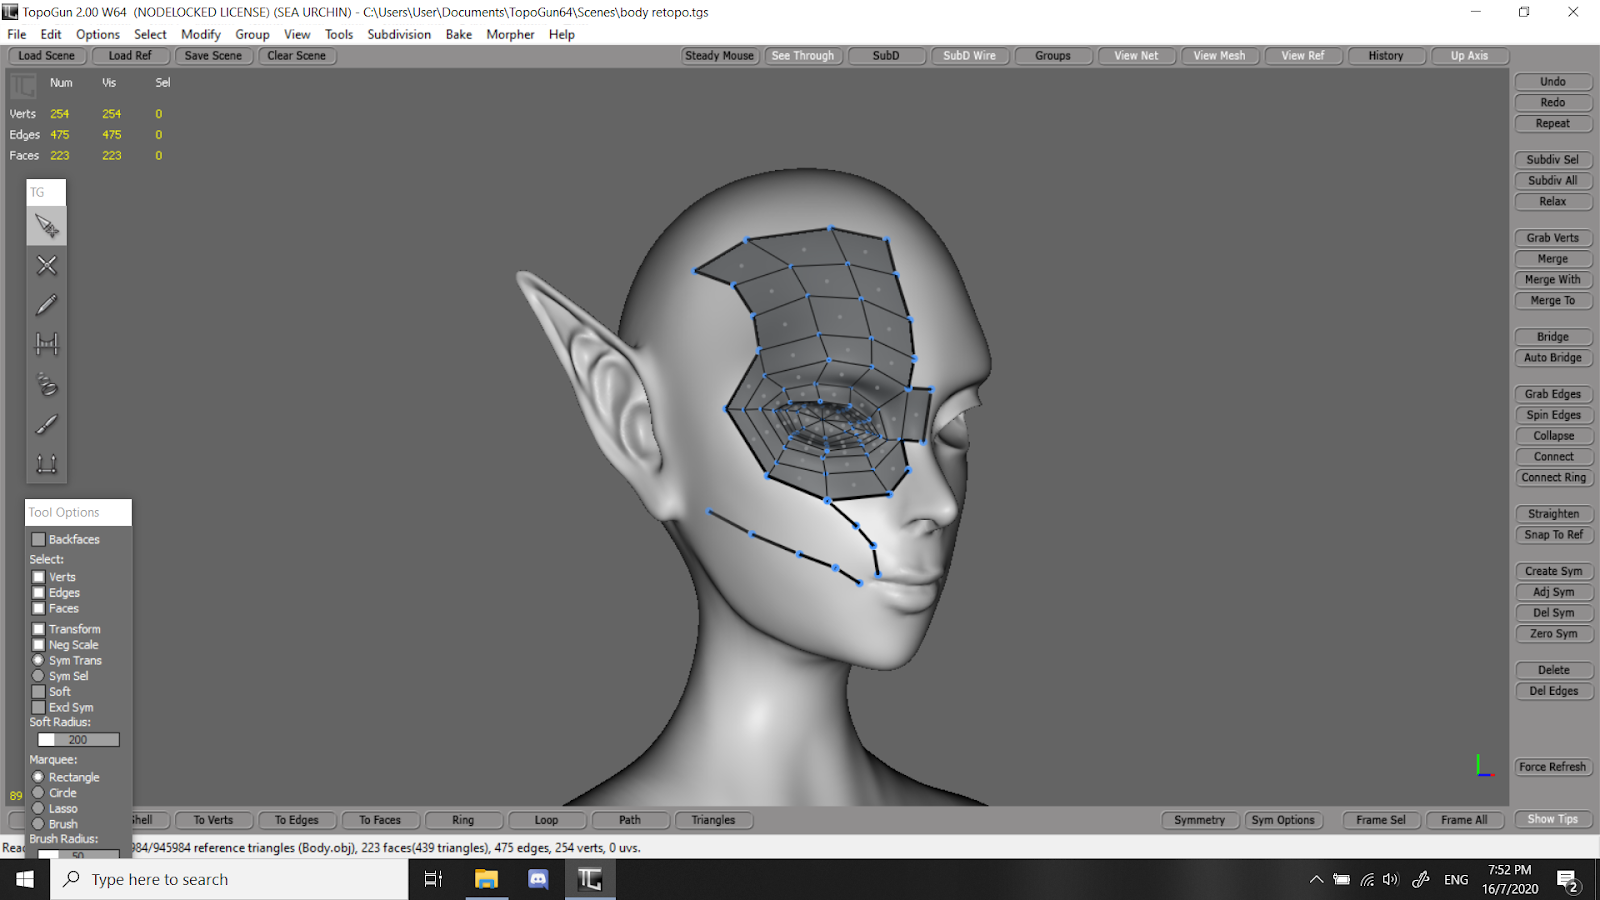
| Fig. 1.47: face retopology |
 |
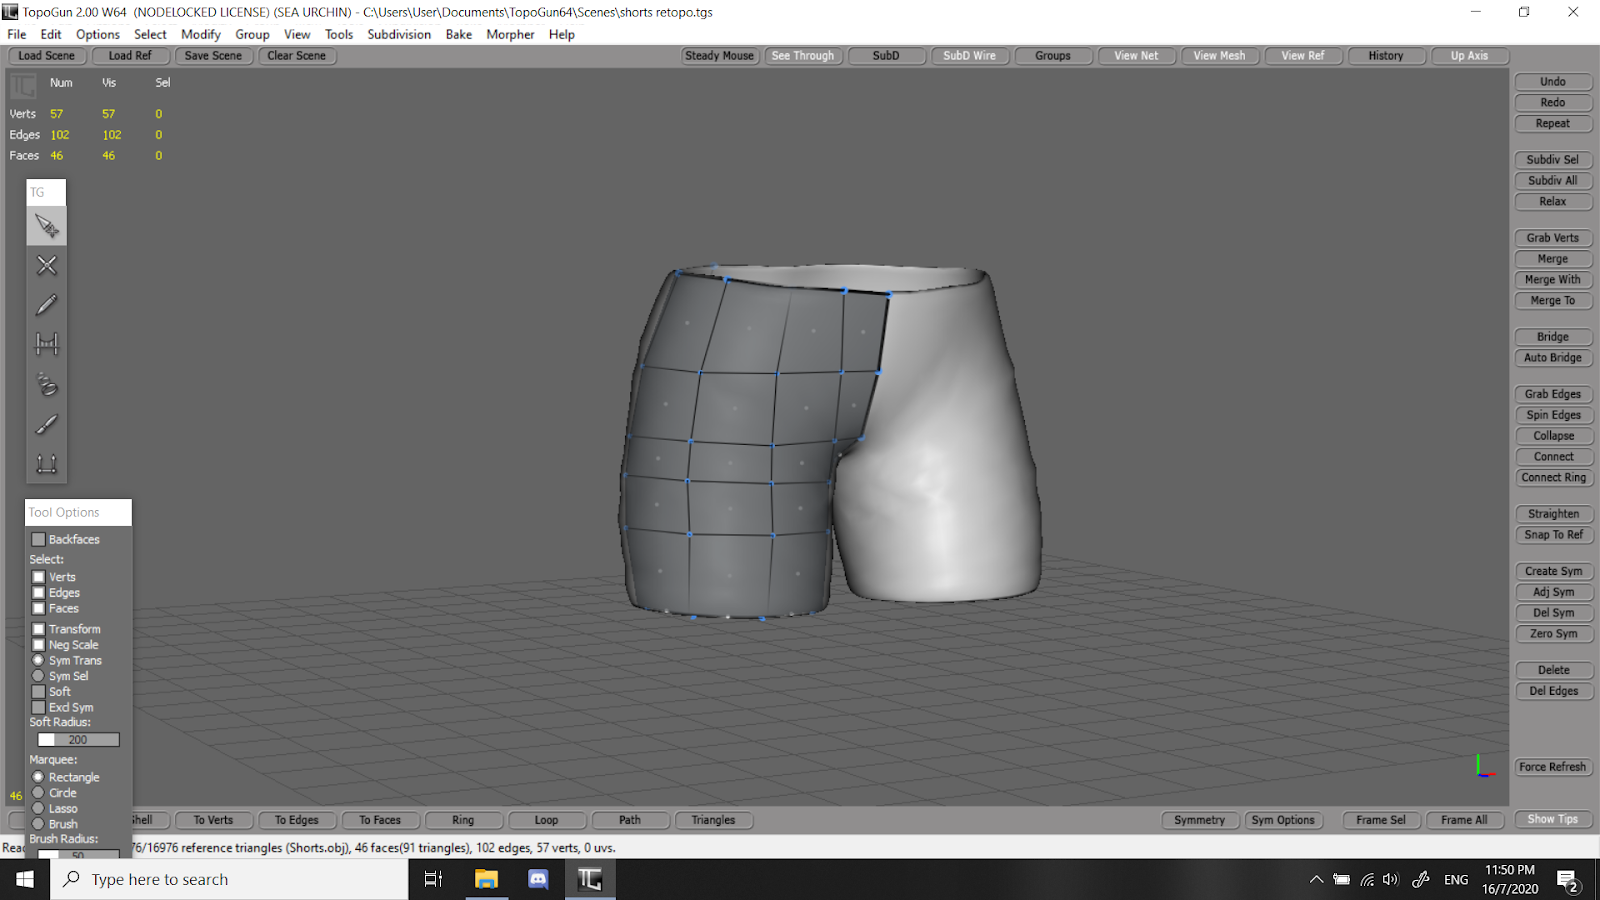
| Fig. 1.48: shorts retopology |
I had a problem where my body reference shrunk and it didn't snap to my mesh.
 |
| Fig. 1.49: this week's problem |
Week 14
17 July 2020
After knowing what to do after retopology, I get on to finish the retopology, uv maps, normal map baking and texturing.
 |
| Fig. 1.50: tried to do symmetry but ended up like this |
 |
| Fig. 1.51: found the problem and had to change the settings before doing symmetry |
 |
| Fig. 1.52: I found that there are some faces that are disappeared after I bridges the points, but actually the faces are facing the wrong side |
 |
| Fig. 1.53: after searching on google, I found that reversing the face would fix the problem |
 |
| Fig. 1.54: the final retopo model in maya |
 |
| Fig. 1.55: I learned a new way of unwraping uv maps after watching a tutorial |
 |
| Fig. 1.54: the result of the body uv map |
After finishing all the uv maps, I moved onto baking the normal maps, everything went well until i got to the staff, after I clicked "bake and close" it did not load the baking progress bar or close the window and that happened to multiple objects. So I gave up trying to fins out what was wrong and found out that I can bake the normal maps in Marmoset Toolbag too so I just baked the rest of the normal maps in there.
 |
| Fig. 1.55: baking normal map process in Maya |
 |
| Fig. 1.56: baking normal map process in Marmoset Toolbag |
Then moving onto Substance Painter, nothing really went wrong with this step but I noticed some parts are sticking out the the clothing/shoes, so after finishing the painting, I went back to maya and fixed the extruded parts.
 |
| Fig. 1.57: just noticed the feet were sticking out of the bottom when I was painting the shoes |
Then I went into Marmoset Toolbag to render the model. I noticed on the body, the lines that make up the low poly model were very prominent and it seems to happen after I plug in the normal map.
 |
| Fig. 1.56: lines very prominent on the skin |
 |
| Fig. 1.57: normal map for the body |
The lines from the low poly is very prominent on there and I checked my other normal maps and seems like its the same see below is normal map of the shorts.
 |
| Fig. 1.58: normal map for shorts |
I don't know what is the problem that caused this or if its normal so I just moved on to finishing the renders. After rendering the t pose, I tried to search up how to pose the model in zbrush since I had a bit of time left.
 |
| Fig. 1.59: process of using zsphere to rig the low poly model |
Rigging in zbrush is a bit hard since my low poly model didn't have all the correct mesh flow so after that I only noticed that my elbow look like it is dislocated -.-" I couldn't get the model to pose more naturally so it ended up looking very stiff. I also learned that I should've deleted the meshes that are covered up by clothing because everything I import it in Marmoset Toolbag and finally on Sketchfab, there's always some faces of the skin peaking out of the clothing. Anyway, here is the final model.
 |
| Fig. 1.60: character render in t pose |
 |
| Fig. 1.60: posed character render (yes the elbow is broken TT) |
 |
| Fig. 1.61: final project poster |
Here is the model uploaded to Sketchfab.
FEEDBACK_
Week 11
26 June 2020
Feedback for concept: Side view of the character's head need to be tilted down a bit, don't do concept like that, do the base colours first no need the markings those can add later on. Can maybe add an elixir that she's carrying on her waist. Always add simple shadow and highlights.
Week 12
3 July 2020
Feedback for block out: The legs are too long as well as the arms, anatomy wise its not there. But good effort.
Week 13
10 July 2020
Feedback for model: Add the details now and remember to add the eyebrows, pull out the back of the hair more and also the left side of the hair is too flat. The staff is too straight, break the straightness, add a knob on the bottom of the staff to balance the wielding. The way that the skirt is falling is wrong, should the tighter around the thigh and flare off at the bottom. Collar bone should protrude a bit and consider adding a bangle. Good effort.
Week 14
17 July 2020
Feedback for retopology progress: Doing ok so far.
REFLECTION_
EXPERIENCES
Week 11
I'm excited about this project starting but hearing we had to combine project 2 and final together is a bit nerve wrecking and considering the timing its already week 11. But I had fun creating the character that I want to do.
Week 12
I'm pretty happy with the progress that I have with this week's model considering all the other modules are also coming near to the end. Mr Kannan's feedbacks are very helpful and straightforward so I know what to fix and better improve my model.
Week 13
Trying to fix the skirt was definitely very time consuming and also frustrating since everything that I tried did not work out in my favour. But I did want to give up even though the step that I ended up using is very time consuming, since its nearing the end and there are still a lot of things that are needed to be done for submission later on.
Week 14
Retopology took quite a bit of time, which was expected but I just have to pull through in order to finish the project.
Week 15
The step for UV and texturing is quite smooth since I've learned what to and not to do from my last project. But when it came down to the problem of the normal map not behaving like I thought it would, is a bit disappointing since I'm at the end and it still does not look the best as it should. Overall I am quite happy with this project, although the final result could be better improved. And I am proud of myself for keeping up with this project each week.
OBSERVATIONS
Week 11
I did not do much with the "block out" but I wished I did more to it rather than just leaving it as separate balls.
Week 12
I had to hold back my tendency of smoothing the model every few minutes, since that is quite useless and just a waste of time.
Week 13
There is so many ways of making a thing that its a struggle when multiple methods used but it still doesn't work.
Week 14
I thought I was pretty behind in progress this week because I've only managed to retopologise a bit more than half of the objects, but I guess I am still on progress but not that behind compared to my classmates.
Week 15
I found that Maya and UV maps always somehow does not want to work with me and I ran into some issues with doing the UV maps as well but I did not have enough time to fully fix them so there are 2 uv maps that have a small part that are not sewn together.
FINDINGS
Week 11
YouTube tutorial definitely helped with further understanding how to use zbrush and the different ways of modeling in zbrush.
Week 12
This week especially has shown me how bad I am at anatomy since I don't practice drawing full body at all and that is entirely my fault as I'm too focused on drawing busts. It showed me that I need to take time to learn anatomy again but more in depth and also practice drawing full body more often.
Week 13
I am glad that I dealt with the skirt and moved onto retopology since I didn't wanna just have the model to show Mr Kannan during the class and make him more worried about our progress.
Week 14
Since Topogun isn't that popular it seems online forums about problems that occur inside it is often outdated which they won't show it which is a bit frustrating. I learned a new way of unwrapping UV which is great and it also saves a bit of time compared to my usual method of unwrapping UVs. This shows there's still a lot of things to learn when it comes to 3D.
Week 15
Again there was a lot of things that I don't understand yet especially on baking normal maps and the setting for it, and especially on rigging and mesh flow. The elbow again looks broken I think because of the mesh flow. It was also a bit hard to rig the model since I didn't learn how to do it, I just watched a tutorial to get it done.


Comments
Post a Comment